A Simple Checklist for Perfect Screen Prints
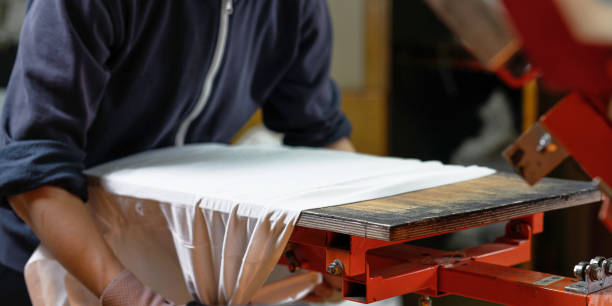
Screen printing has always been about more than ink on fabric. It is about expression, connection, and creating something that lasts. Many professionals delivering Glendora screen printing services because each print matters and every detail counts. To achieve results worth keeping, a checklist ensures that nothing slips through the cracks. This approach keeps the process structured, lowers the chance of wasted effort, and gives consistent results no matter the project size. When every print must meet high expectations, having a reliable system becomes the difference between average work and results that impress.
1. Preparing Artwork for Glendora Screen Printing Services
Every successful print begins with artwork that is sharp, well-prepared, and easy to transfer onto a screen. Clean lines and correct sizing are vital, and color separations must be exact when multiple inks are used.
Keep files in high resolution
Ensure proper sizing for the garment
Separate colors clearly for layered designs
Professionals know that if artwork preparation is rushed, the entire process can collapse later. A slightly blurry design, incorrect size, or messy color separation means extra work, lost time, and wasted materials. Spending a little longer here ensures the final print communicates the design clearly.
2. Picking the Right Screen
The screen is the heart of the process. The mesh count determines the print’s outcome. High mesh suits delicate details, while low mesh handles bold, heavy coverage. The wrong choice often leads to poor results. Professionals rely on:
110 mesh: bold designs, heavy ink coverage
156 mesh: standard printing for most fabrics
230 mesh: fine detail and lighter ink layers
Choosing the right screen can make or break a job. For example, a bold logo on a hoodie will require a lower mesh count to push enough ink into the thicker fabric. A fine, intricate pattern for a lightweight tee needs higher mesh to hold detail. Skipping this consideration causes uneven lines, blotches, or faded spots.
3. Even Coating and Drying of Emulsion
Smooth emulsion creates a reliable stencil. An uneven coat risks blotches or weak spots. Drying screens in a dust-free space with balanced airflow ensures durability. A stable stencil means multiple prints without degradation.
When coating, each stroke must be consistent. If one side has more emulsion than the other, the exposure process will fail. Dust or debris trapped inside the emulsion also weakens the stencil, causing small imperfections during printing. Drying is equally important; if the emulsion is not completely dry, exposure becomes unpredictable.
4. Exposing the Screen with Accuracy
Exposure defines the design’s clarity. Underexposure leads to washouts, while overexposure erases detail. Professionals delivering Glendora screen printing services often rely on test strips to find the perfect timing. Accurate exposure saves resources and protects the quality of the artwork.
Different light sources and emulsion types require varying times. Rushing or guessing creates frustration when details disappear or the stencil breaks down after a few pulls. Proper exposure transforms the coated screen into a usable tool that can handle hundreds of prints without distortion. Many professionals mark down exposure times for different setups to maintain consistency across projects. When handled carefully, this step brings designs to life exactly as planned, keeping both detail and durability intact.
5. Careful Washout for Clear Stencils
Once exposed, the screen must be washed out to reveal the design. Balanced water pressure prevents damage while clearing away soft emulsion. Careful washing leads to sharper edges and better prints.
Using too much pressure risks blowing out fine details, while too little leaves residue that blocks ink. Warm water helps soften emulsion for an even wash. Some professionals let the screen rest briefly before washing to ensure the hardened areas remain solid. Taking extra time here guarantees that every edge of the stencil is crisp, setting up the design for smooth printing.
6. Aligning the Screen Properly
Alignment matters most in multi-color projects. Without proper placement, designs can overlap awkwardly or print off-center. Alignment guarantees a clean, balanced look on every garment.
Checklist for alignment:
Center screen on press
Lock tight before test print
Double-check placement with a sample garment
Even small alignment errors can ruin a batch of shirts. Professionals delivering Glendora screen printing services often use registration marks to line up multiple screens. Test prints confirm placement before production begins. Correct alignment ensures logos, text, or artwork appear exactly where intended. This small step saves frustration, especially when printing on varied garment sizes or styles.
7. Selecting and Mixing Ink
Ink consistency makes or breaks the print. Thick ink cracks, thin ink fades, but well-mixed ink stays smooth and reliable. Professionals providing Glendora screen printing services often prepare inks according to fabric type:
| Ink Type | Best For | Benefit |
| Plastisol | Cotton, blends | Durable and vibrant |
| Water-based | Light fabrics | Soft, breathable finish |
| Discharge | Dark cotton | Soft feel, removes base color |
Mixing inks thoroughly prevents streaks or uneven coverage. Pigments and bases must combine fully for a consistent color tone. Many professionals keep mixing tools dedicated solely to inks for reliability. Proper storage conditions—away from direct sunlight and sealed tightly—keep inks stable and ready for use.
8. Applying Steady Squeegee Pressure
The squeegee is not just a tool—it is the control point of ink flow. Too much pressure floods the design, while too little leaves gaps. Smooth, even strokes allow for sharp results and balanced coverage. With practice, steady pressure becomes second nature.
Squeegee angle also plays a role. A sharper angle pushes less ink, while a flatter angle lays down more. Professionals learn to adjust based on fabric type and design complexity. Consistency in speed and angle ensures that every print looks identical to the one before it. Training and repetition help printers maintain the right balance, producing clean, consistent outcomes for both small and large runs.
9. Curing and Inspecting the Final Print
Curing is the last safeguard of quality. Proper heat locks ink into fibers, preventing fading and peeling. After curing, every print should be inspected:
Look for sharp edges
Ensure even ink coverage
Check for consistent placement
Incorrect curing temperatures can cause ink to wash out too soon or become brittle. Professionals often use temperature strips or heat guns to confirm accuracy. Inspection after curing provides peace of mind that the job is complete and meets expectations. A thorough review before garments leave the press avoids customer complaints and maintains trust.
Why This Checklist Matters
This checklist turns a complicated process into a structured routine. By following it step by step, anyone using screen printing services can achieve clean, consistent, and lasting results. It reduces mistakes, saves money, and delivers prints that people want to keep wearing.
Beyond efficiency, the checklist builds confidence. Each completed step confirms progress, and by the end, the printer knows the product is ready to wear and enjoy. A clear system like this supports growth, improves customer relationships, and gives businesses an edge in reliability.
Conclusion
Perfect screen printing does not rely on chance. It comes from following a system built on accuracy, consistency, and care. With this simple checklist, professionals can approach every project with confidence. Each step builds toward a final product that truly reflects effort and dedication. For those seeking reliability and consistency, working with Embroider Print ensures that every print tells its story the right way.


